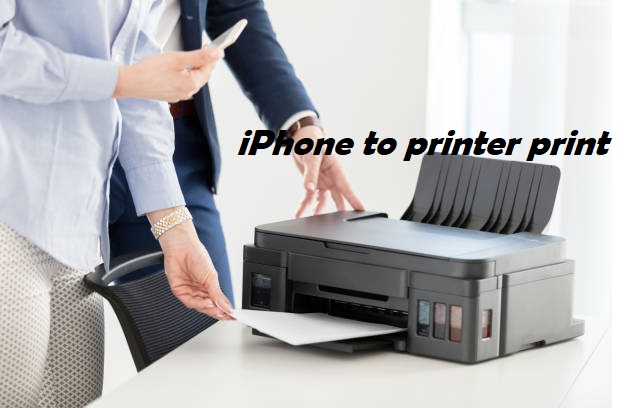
The iPhone might be the best camera in the world for many consumer photo needs, and the images it produces can really beg to be taken out of the digital world and put on a proper piece of paper for the proverbial fridge door. The 4×6 photo size is just one of many sizes that might be possible, but it has the special quality of being an obviously optimal solution. In this article you today you will learn about how you can easily print 4×6 photos from iPhone to printer.
So, let us discuss the methods of transposing these mesmerizing digital moments on your iPhone to the physical world. The trickery is in figuring out how to print 4×6 photos from your iPhone through a printer that actually allows you to do so.
Decoding this process requires a thorough comprehension of the process itself, supplemented with tips and tricks to help convert those iPhone-stored memories into hard copies with ease.
Now, before you send your digital photos off to the printer, you first need to adjust the aspect ratio – an important first step on the road to turning digital files into real objects d’art.
Steps to Adjust the Aspect Ratio to 4×6
The first thing you need to have when you want to print your photos from your iPhone is a printer. You need to, however, understand that before you send the photo for printing, it is essential to adjust the aspect ratio.
The Step-by-Step Procedure to Adjust the Aspect Ratio is Simple:
- Step 1: Launch the photo app and then select the work of art with which you want to tweak the aspect ratio by hand.
- Step 2: Next, click on the edit button that rests high up on the interface to activate the edit function.
- Step 3: Scroll down and down further until you see the crop function — a crucial part of the digital transformation we are managing.
- Step 4: Now, you will be using the aspect option to make finer adjustments within the constraints of the crop window.
- Step 5: Here you see a variety of sizes line up in front of you almost like a pallet of paints- Do 4 x 6, the viewfinder of your visual storytelling eyes.
- Step 6: Suddenly, you will see a playful box come up on your screen amidst the dreamy background photo you chose. This virtual frame you wield with grace, to mold it to the silhouette of your boundless imagination.
- Step 7: Enjoy the freedom to drag and reposition the elements of your photo in the box while creatively recomposing to your heart’s content.
- Step 8: This tango of space takes an eternity, where the box must have the perfect size and width. This inflexible continuity is the only way to protect the sanctity of the revered aspect ratio.
- Step 9: Then, make the smooth transition to the crop tool located in the furthest reaches of your interface finishing off your fine-tuning.
- Step 10: With the preview canvas lifted, examine the resulting image with a critical eye. If the warm Grim Fandango of satisfaction has embraced you, then the Save button calls out, the centerpiece of the digital tableau that is your benediction.
- Step 11: Now that we know it looks beautiful, go ahead and print that sucker — the medium through which your visual masterpiece will become more real than digital.
- Step 12: Listlessly sigh yes and yes only then release your grip upon the aspect ratio that the heavens alone have willed as the printer devoutly extracts your soul, which shall grant you life eternal, as 4×6.
Easily Print 4×6 Photos from the iPhone to the Printer: Best Guide 2024
There are 2 ways to print 4×6 photos from the iPhone to the printer. We will go into the details of both these below.
1. Use AirPrint:
- Modern printers have an AirPrint mechanism. AirPrint mechanism means that you can transfer photos from the iPhone to the printer directly. You will not need any cable or any intermediate device to print the photos.
- A lot depends on the printer you have. If you have an older printer, the aspect ratio might be impacted.
- In that case, using AirPrint will not help you much.
- However, most modern printers will print the photo precisely as per the setting that you have on your iPhone. In that case, using AirPrint indeed serves you well.
- In case you have an older printer, there is an alternative.
2. Use a PC or Mac:
- If you have an older printer, the only option is to transfer the photo to the PC or the Mac.
- From a PC or Mac, you can use any photo editing tool to give the print command. You can directly print the photo without going through the photo editing app.
- The advantage of doing so is that you can see the photo preview in any photo editing app. You can confirm the size of the print, and after that, you can give the print command.
- That way, accurately printing the photos becomes possible.
- With the help of our guide above, it is easy to print 4×6 photos from the iPhone to the printer. We will now share a few tips to print these photos without any glitches or mistakes.
Tips to Get Perfect Prints From iPhone to The Printer
The few tips we will highlight below ensure that you can get good-quality prints for your photos.
1. Use the correct paper:
It is vital to use the right paper. Even if you captured the photo adequately and used the right aspect ratio, if the paper is not proper, you won’t get a good print.
When buying the paper for the printer, you have to choose between the glossy and matte types. In case you need sharp photos, you can go with the glossy ones. Otherwise, you can go with matte paper.
The papers are available in different sizes. You have to choose the size according to the type of prints which you usually opt for.
2. Use the right printer:
It is best to use modern printers. The reason for the same is that they can print HD-quality photos. Not only that, you can give the print command wirelessly if using a modern printer.
If you’re using inkjet or other older printers, even when you give the print command from the PC or the Mac, the quality of the photos will not be up to the mark.
3. Edit at the highest resolution:
When editing the photos on your phone or any other device, you have to save the images at the highest possible resolution. That way, there will not be a down-gradation of the quality of your photos.
Similarly, when you’re transferring them to another device or the printer, you have to transfer them in the maximum possible resolution. Once you do so, it is easy to get HD-quality prints.
4. Edit only if necessary:
Many people think about applying filters or editing the photos in one way or the other. Plenty of times, you might end up downgrading the resolution when you’re editing it.
Only when you need to edit the photos should you go ahead with the same. Otherwise, it is a good idea to print the images as they are. Editing can downgrade the quality as well if you’re not careful about it.
5. Optimize your photos before printing:
Optimizing the photo before printing is a necessity. Specially, you have to adjust the aspect ratio since you need 4×6 prints.
The good news is that the iPhone allows you to adjust the aspect ratio without undertaking any extra steps. That way, it becomes easy to get HD-quality prints.
6. Use AirPrint when possible:
The AirPrint mechanism allows you to give the print command right from your smartphone directly. Even though it may be a bit confusing for first-timers to give such prints, in the long run, this can certainly help you out. You have to use this technology whenever possible.
Thus, when you want to print 4×6 photos from an iPhone to the printer, these are the tips that you have to always stick to. In case you’re looking for some alternatives, we will highlight two such options below.
Alternatives to Print 4×6 Photos from iPhone to Printer
There are essentially two other ways to print such photos.
1. Photo printing apps and websites:
Numerous apps allow you to print such photos and, after that, send them to you via regular mail. These include:
- Shutterfly
- Free prints
- Print Studio
- And so on
To avoid the cumbersome procedure of giving the prints and editing the photos, you can use these apps.
2. Local print store:
You can also visit a local print store for the same. The print stores can print all the photos for you and directly give you the copies with the dimensions you want. Since the print store will have professionals, you will no longer have to worry about any glitches. These are the two alternatives you have.
How to Print 4×6 Photos from Android
Printing your cherished 4×6 photos from your Android device is a delightful process that transforms digital memories into tangible keepsakes. Here’s a step-by-step guide for this endeavor:
1. Photo Picking Prowess:
Begin your photo-printing odyssey by navigating to your Gallery or Photos app. Select the snapshot that encapsulates the essence you wish to immortalize in a 4×6 format.
2. Engage the Sharing Symphony:
Unleash the sharing prowess by tapping the icon adorned with interconnected lines or the mystical “Share” word. This opens up a gateway to a plethora of sharing possibilities.
3. Invoke the Printing Rite:
Among the digital offerings, seek the sacred command titled “Print” or perhaps the more poetic “Print Photo.” Invoke this command to usher in the mystical world of printing.
4. Summon Your Printer Familiar:
Like a wizard calling upon a loyal companion, summon your trusted printer. Ensure it is harmoniously connected to the same cosmic network as your Android device, and witness its appearance in the enchanted list of available printers.
5. Craft the Printing Tapestry:
Navigate through the ethereal tapestry of print settings. Seek out the sacred scroll that dictates paper size and layout. Bestow upon your photo the dimensions of 4×6 inches, crafting a bespoke canvas for your visual masterpiece.
6. Review with Discriminating Eyes:
Before sealing the fate of your print journey, exercise discernment. Delve into the minutiae of your choices — the number of copies, the sacred dimensions, and any other peculiarities that may shape the destiny of your print.
7. Evoke the Printing Incantation:
Satisfied with the concoction of your print settings, perform the grand finale by uttering the incantation known as “Print.” Witness as the digital realm bows to your command, and your Android device dispatches the magic to the printer.
As the printing apparatus springs to life, revel in the anticipation of holding a tangible relic of your memories. Embrace the uniqueness of each step, for in this journey, you are not merely printing a photo; you are conjuring a tangible manifestation of your digital saga. May your 4×6 prints be as vibrant and memorable as the moments they encapsulate.
Recap
With our guide above, easily print 4×6 photos from iPhone to printer is certainly possible. The procedure is pretty easy. Whenever you’re faced with the task of printing, follow our guide above, and you can print the photos in no time.
Frequently Asked Questions (FAQ):
What to do if you can’t send photos from your iPhone to the printer?
If you can’t send photos from your iPhone to the printer for some reason, you can transfer them to a Mac or PC. After that, from a Mac or PC, you can send the photos to the printer. Once you do so, it becomes easy for you to print the photos. If that also does not work, we have shared a couple of alternatives that will allow you to get the photo prints.
How to ensure that the photos you send are high-resolution?
The iPhone camera usually captures these photos in high resolution. As long as you’re not fidgeting around or tweaking the settings, these photos will remain in HD resolution. While transferring them to another device, you have to ensure that the resolution is not downgraded.
How do I resize a photo to print 4×6 on my iPhone?
Resizing a photo on your iPhone for a 4×6 print is a breeze! Simply open the photo, tap “Edit,” then select the crop tool. Choose the 4×6 aspect ratio, adjust as needed, and hit “Done.” Voila! Your photo is now ready for a perfect 4×6 print.
How do I print a 4×6 picture on my printer?
Printing a 4×6 picture from your printer is simple. Transfer the resized photo to your computer, open it using your preferred image viewer, and select the print option. Choose your printer and paper settings, ensuring the paper size is set to 4×6 inches. Click “Print,” and enjoy your beautifully sized photo!
How do I change print size when printing from an iPhone?
It does all this with a dead easy right-click on an iPhone print size. Tap on the share icon and choose the Print option while you are at it. You can then zoom in or out on the image preview to get the right size and choose your printer and printer settings, including size. Once you’ve made your selection, click the Print button to obtain a photo with your unique dimensions.
How do I print different sizes of photos from my iPhone?
Its easy and a fun never ending to print different sizes of photos from your iPhone Open Photos, find the photo, tap Print, then select your printer. To change the dimensions, select “Options” to choose one of the available sizes. Whether it’s 4×6, 5×7, or any other size, your iPhone makes it a seamless process to bring your memories to life on paper.